Aerial Training Membership Opportunity!

Open training in the studio!

Aerial Training Membership Opportunity!

Need more training time? Consider becoming an SGS member! 

We are opening up memberships to intermediate/advanced students and pre-professional and professional artists! To qualify, you must have been training on your apparatus for more than a year and be comfortable training without coach supervision.

Members can sign up to train aerial or ground skills during member-exclusive training times and are welcome to come to Open Gym and Acro Jams for no additional cost. There is no limit to how many trainings you attend throughout the month. Train as much as you want!

Training times are flexible. Just let us know what days and times you’re interested in; we will work to accommodate your schedule and add training times that work for you. Training times may change from month to month due to class schedules. Please note that classes and workshops get scheduling priority.

The cost is $110/month or $100/month if you commit to a minimum of three months. There are a limited number of memberships are available. Email or message us if you’re interested in more information and applying! Email us if you are interested.

Current Member Training Schedule

Check out all our classes!

Sign up for class here->

Beginner Aerial and Handstand Classes

Photo by Sky Wild Photography

Not sure where to start or never tried circus? No worries, check out our Beginner Aerial and Handstand Classes. Try the various aerial apparatuses we offer or give handstands a try. No experience required!

Beginner Aerial Classes
Fridays at 11 am & Sundays at 10:45 am
New to circus arts or returning after a long break? This is the class for you!
In this beginner-level class, we will focus on the basics: getting strong, learning the lingo, and trying out the various apparatuses. This is a great introduction to the world of aerial performance by teaching you how to apply the new dimension of vertical space. Let’s play with the X, Y, and Z axes!
Sign up here ->

Beginner Handstands Class
Tuesdays at 4:30 pm
This class is designed for people who are interested in handstanding but don’t know where to begin. In this weekly class, we will focus on drills to strengthen our core, shoulders, and stabilizer muscles needed for finding that perfect handstand line. These drills will be interspersed with breaks for stretching and technique discussions.
Sign up here ->

Check out all our classes here->

Featured Student of the Week – Elana G

“I started training in 2015. I love the positive, encouraging community at Stomping Ground. Kristen is a terrific teacher, and the students are so supportive of each other. Everyone is there to cheer each other on, work hard, and have fun. Plus, it’s the only strength training I’ve ever looked forward to!”

-Elana

Tissu or Lyra – The Great Debate

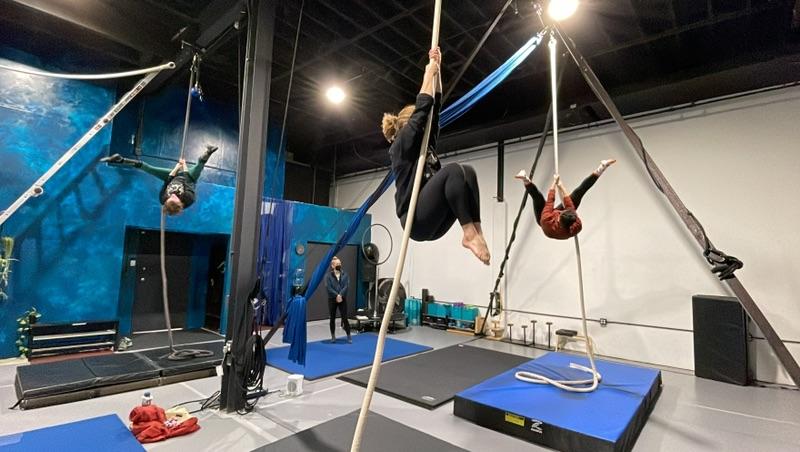
You’re probably aware that aerial arts involves acrobatic dancers and athletes performing stunning and awe-inspiring feats high above ground. 

But as a student, you may be wondering – what exactly counts as an aerial art form, and what are the different ways to learn them?

There are a wide variety of aerial apparatuses which have a variety of names – aerial fabric (also called tissu or silks), aerial hoop (lyra), trapeze, hammock (sling), and rope (corde lisse) are some of the most commonly taught apparatus at any circus studio, though you may certainly see others offered. 

At Stomping Ground Studio, we offer classes in two very different aerial apparatuses – aerial tissu (or silks) and lyra (aerial hoop). 

If you know you’d like to try out an aerial class but are debating exactly how to get started, we’ve got some advice. 

Below, we’ve collected some of the key features of training in both tissu and lyra so that you can decide which is a better fit for you. 
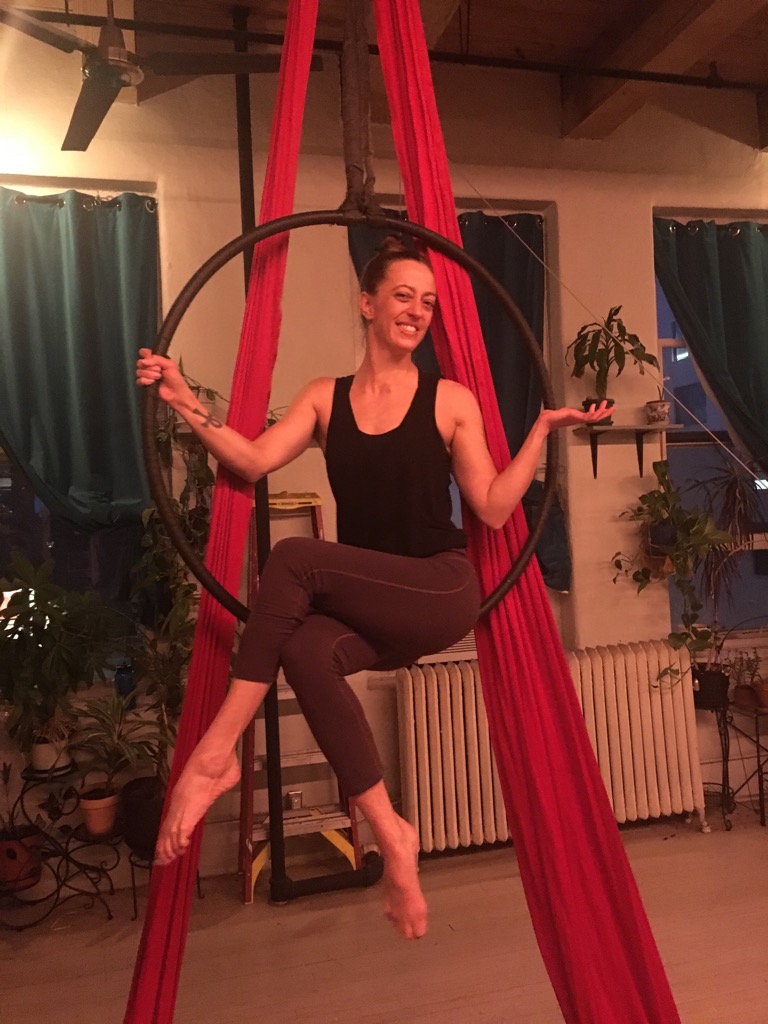
Lyra

First off, let’s start with a brief definition. 

Lyra – or aerial hoop – is a metal ring (most frequently made of steel). They might be wrapped in a soft tape or left bare, with metal exposed. They also come in a wide variety of sizes, perhaps barely big enough for your body to fit through or large enough to comfortably accommodate multiple performer’s limbs and torsos. Lyras are most commonly rigged as either single or double point, meaning that the hoop’s central overhead anchor is either from one spot or two. 

What people like

Making bendy shapes with your body. Lyra is a great apparatus for showcasing flexibility. The sturdy metal structure offers something solid to hold onto while its circular shape allows limbs to press or extend at a distance from each other.

A chance to rest. Because there is a “bottom bar” – the part of the hoop that is closest to the ground – you can always come to a seat in the lyra to take a little breather in between poses. This sets lyra (and trapeze) apart from many other apparatuses that simply hang in one vertical line. 

Ability to partner up. Lyra is one of the most common aerial apparatuses that you’ll see used in duo performances. Specially sized lyras made for two people are widely available, and partner lyra technique is taught in many studios. 

A quicker learning curve. It’s possible to learn a wide repertoire of lyra skills in just a few classes. This might make lyra a good fit for you if you are interested in learning Instagrammable poses or creating choreography for a performance right away.

Spinning! For some of us, spinning is downright fun! Plus, it can also make for a great featured element in a performance. Though you can spin on a vertical apparatus, the job is much easier on a lyra simply because there is less material weighing you down towards the floor. 

What people don’t like

Metal is hard. Though the firm metal of the hoop does help to give you a solid grip, it also takes a little time to build up the right callouses. And you will need those callouses. Lyra can be tough on your hands, knees, elbow pits or any other body part that presses into the hoop. Be prepared for some weird bruises!

More static, less dynamic. We firmly believe that any apparatus can be used dynamically. However, when you’re just starting out, the way your body will be moving on a lyra will be different than on a vertical apparatus. If you love the feeling of moving through space and swinging your limbs around you, you might prefer the dynamic movements that are well suited to vertical apparatuses. 

A quicker learning curve. While learning a lot quickly may be a perk for some, it can also lead to boredom for others. Most of the new shapes and techniques you will learn on a lyra will come up front, and be expanded and perfected over time. 

How to progress

Train your flexibility. We recommend a combination of active flexibility (lifting or lengthening areas of the body with your own strength) and passive (sitting in a stretch for an extended period of time). With greater bendiness, you’ll be able to take lyra shapes to their fullest potential. 

Spinning tolerance. Spinning does not come naturally to everyone. If it makes you feel a little queasy or uneasy, take it slow and try to build your tolerance over time. Learning the dance technique of “spotting” or training yourself to focus on a fixed point on your body can help. 

Strengthen your hands. Holding onto a metal circle for minutes at a time can get exhausting. Work on improving your ability to grip by holding weights (or even full grocery bags) and stretching your fingers and wrists often. 

Try different types of lyras. There’s a lot of variety, so be sure to expand your horizons, if you’re able. You may find that you only like taped lyra and don’t like gripping bare metal, or vice versa. You may prefer a single-point to a double-point. But you’ll only know if you try!
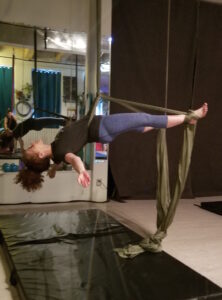
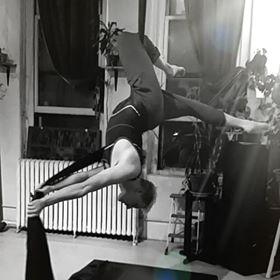
Tissu

What people like: 

An athletic experience. Because you cannot take resting poses as easily as on a lyra, many people find tissu a more challenging athletic experience. If you enjoy cardio or endurance sports, this may be a good fit for you. 

Dynamic movement. A vertical apparatus, like tissu, has a movement all its own. Fabric can move – or be moved – in any plane, in any direction, fast or slow, like a whip or like taffy. Students that enjoy moving with their whole bodies in a variety of movements seem to appreciate this about tissu. 

Solving puzzles. In order to perform many moves on aerial tissu, your body has to move one way, at one time, towards a place, and arrive in a certain way. Learning fabric can be sort of like a logic puzzle for your body. For many students, the best part of a tissu class is trying to figure out all the different pieces of a new move – or, eventually, creating their own wraps and positions.

What people don’t like: 

A steep learning curve. Tissu can be a particularly intimidating apparatus to learn. It’s vertical (no rest breaks), requires endurance (which you may or may not have lots off), and it’s slippery (requires good grip strength. While there are several fundamental moves and shapes on tissu, learning just the basics can take several classes, weeks, or months. You may not always leave your first classes feeling like the champ you are. 

Considerable upper body strength. To do pretty much anything on fabric, you’ve got to have a strong upper body. Your core must stabilize you, and your arms, back, chest, and shoulders have to work to pull your entire body weight against gravity. It will certainly be built over time as you continue your training. Students rarely come to their first class able to complete a full pull-up, so don’t sweat it!

Going upside down. Some people love it. And some definitely don’t. Unlike on lyra, where there are many shapes you can make while keeping your head pointing up (or at least sideways), one of the fundamental skills of tissu is gaining comfort with inverting, when your head is the lowest part of your body. If even the thought of this sends you into a panic, you should expect to take things one tiny step at a time. 

How to progress

Increase your upper body strength. One of the best possible things you can do to improve your skills on vertical apparatus is to get better at pull-ups. Hang from a pull up bar. Hold yourself at the bar with bent arms and with straight arms (shoulders engaged). Hold yourself and slowly lower down. Repeat until you can pull yourself up. Then repeat, repeat, repeat…

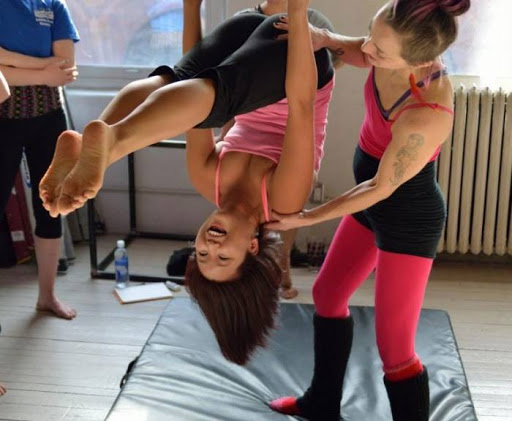
Challenge your comfort with going upside down. If inverting makes you nervous, start to play with going upside-down in slow, safe ways. Have a friend spot you in a handstand or headstand or do them against an empty wall. Try out a slow-paced aerial yoga class, and allow the aerial sling to give you all the support you need to tip back. 

Everything on both sides! When you approach tissu, it’s often to one side of your body. Your teacher may have you climb, tie in your foot, or hook a knee on one side. Do it on the other side too. For the folks in the back – DO IT ON THE OTHER SIDE TOO. You may see many advanced aerialist who can perform a beautiful skill on their right but UGH what’s that on the left? You may be a beginner, but you don’t have to be lazy! Do both sides. 

Pay attention to theory. As you are learning wraps, pay attention to not just how to get to them but also how they work. What is keeping you locked in? What doesn’t work? The more you pay attention to the puzzles behind the moves, the more you’ll be able to experiment and pick up new skills as you progress. 

When in doubt… Do both!

While many people may find they have a preference between one apparatus or another, the beginning of your aerial education is the perfect time to try several. 

At Stomping Ground Studio, you can take a class in tissu or in lyra OR try a mixed apparatus class where time will be split between the two apparatuses. 

Whichever you choose, we recommend a minimum of three classes within three weeks to get the best feel for the apparatus that works best for you. 

Stay tuned for more tips on getting the most out of your first aerial class!

Studio Update – Guest Coach Lynn Lunny Subs for Handstand Class on Sept 16

Lynn Lunny Handstand

Improve your handstands with the lovely Lynn Lunny. She will be our guest coach subbing for Handstands class on Monday Sept 16th. Lynn is a phenomenal coach. She will certainly teach you some effective drills and techniques to better find your balance and acquire that perfect line in your handstand. Come learn from this very talented hand-balancer and acrobat. Sign up on the MindBody app now to secure your spot.

How to Find the Right Aerial Studio

Kristen Zyra Teaching Lyra

As aerial coaches, after people learn what we do, we often hear them say… “I wish I could do that.”

Our response… “What’s stopping you?”

Maybe you’ve seen clips of acrobats from Cirque du Soleil, or have a friend who’s dabbled in aerial arts. Maybe you’ve considered trying it out yourself. But maybe an aversion to risk – or a fear of the unknown – has held you back. 

Trying anything new can be daunting, let alone an acrobatic art form that takes place in the air surrounded by a group of people. With your feet on the ground and your upper body strength more aspirational than actual, it can be difficult to even know where to get started. 

The very first step to getting started in aerial arts is simple, but requires a little research. 

Your first step is to find a studio. 

(Told you it was simple.)

The next step: figuring out which one to try!

We know that as exciting as it is to do something new, you may have plenty of questions. 

How do you know what to look for when you don’t even know what you’ll be doing?

What should you look for in a studio?

Which class should you take?

What questions should you ask? 

Below, we’ve collected our best tips for finding an aerial studio that’s a good fit for you so you can finally get to class and get airborne.

Aerial arts – NOT aerial yoga

Aerial yoga has grown in popularity over the years. It’s offered at yoga studios, aerial studios, community centers, and at wellness retreats around the world. 

But let’s get one thing clear…

Aerial yoga is not an aerial art. 

Confusing aerial arts for aerial yoga is a common mistake, one that students will sometimes make even after their first class. 

While aerial yoga tends to involve flowing movements and meditation that builds a strong mind-body connection, aerial arts classes operate more like athletic training, with warm ups, conditioning, and repetition of specific drills and skills. 

Aerial yoga is performed on a hammock apparatus – a loop of aerial fabric – while aerial arts may be performed on hammocks, split-panel fabrics, aerial rope, trapeze, lyra (aerial hoop), and more. 

Furthermore, in a yoga class, you’ll usually be given cues to follow throughout the whole class, linking each movement with your breath, while in aerial arts you’ll be taught a series of moves which you will then practice repeatedly over the course of class.

Both classes can be fun and offer a connection to your body and an opportunity to build strength and flexibility – but they are distinctly different. Make sure you know which form of aerial movement a studio offers. 

Stomping Ground Studio does not teach aerial yoga, though some of our coaches are certified (land) yoga instructors. 

Drop-ins or sessions?

One big variation between studios is whether they offer classes on a drop-in or session basis. 

Drop-ins mean that you are only committing to a single class. The students in attendance may vary from week to week, as will the skills and techniques you focus on. Drop-ins are popular because they only require payment for one class at a time, and can fit a busy student’s schedule.

In a session format, you will commit to classes on the same day, at the same time, for a given length of time (often 4-10 weeks). This format can be beneficial for beginners because you will  build skills in a linear progression. 

Be sure to read studio policies and schedules carefully so you understand which class model is followed. 

Stomping Ground currently offers classes only on a drop-in basis, meaning you can create your own training schedule and come to classes when it’s most convenient for you. 

Find the right class

Not all aerial studios operate the same way. Most will offer an array of classes that depend on their training focus or facility logistics. 

A studio may be a circus studio that offers juggling, tumbling, or acrobatics in addition to aerial arts. If it’s primarily a performance studio that also offers classes, there may be a focus on quality of movement or choreography. Some studios offer only pole, lyra, or trapeze, and not vertical apparatuses like fabric or rope – particularly if their ceiling height is lower than 10 feet. 

Before you commit to a class, be sure to look through class descriptions on a studio’s website to see what you’re in for. A solid class description should give you an idea of the apparatus used, as well as the primary focus of instruction and any necessary prerequisites. 

Don’t see the information you need? Reach out to the studio directly to tell them you’re new to aerial and want to be sure to register for the right class. 

Some studios will even offer an introductory class or workshop so you can get a feel for what to expect.  

At Stomping Ground, all beginning aerial students should register for a Level 1 or mixed-level class. We offer Tissu 1, Lyra 1, or a chance to explore both these apparatuses with Aerial 1 – Mixed Apparatus. Handstand and Flexibility classes are open to students of all experience levels. 

Take a look at your instructor(s)

Not only will doing a little research on your instructor before class make you familiar with their face – it will help you understand their strengths and style as a teacher. 

If a studio you’re interested in has multiple instructors, take some time to learn about them and see which one might be the best fit. You can often find instructor bios on a studio’s website, or see pictures or videos of them in action on social media. 

If you have a strong athletic background and like to be pushed physically, a teacher who was a former athlete or a personal trainer might meet your needs well. On the other hand, perhaps you’re interested in performing, and want to find a teacher with a background in dance, theatre, or clown. 

You can find the bios of Stomping Ground Studio’s coaches right here. 

Perform a casual safety check

You certainly don’t need to be a professional rigger to be able to take an aerial class – but knowing a few safety essentials will help you feel confident that you’re in good hands at your chosen studio. 

Here are a few things to look out for:

  • Good rigging. Again, you don’t need to be an expert! Just take a look up at the rig points (the hardware and fixed mounts from which your apparatus is hung) to see what’s happening up there. Gear should be attached to something solid – like a wood or metal beam – that spans from one point to another. It may also be secured to a sturdy eye-bolt that is driven through a solid material (like cement or metal). Sometimes, a rig will involve a system of ropes and pulleys. All of these would be normal to encounter in an aerial classroom. All rigging should be visible and look relatively neat and tidy – no loose straps or danglies hanging around.
  • Thick mats. If you are leaving the ground or going upside down, you should have a good mat underneath you – at least a couple inches thick. If you are working over bare cement floors or using only thin padding (like yoga mats) underneath you, that could be a sign that this studio is not taking your safety seriously. Bring any questions or concerns to a studio owner or administrator. They should be able to clearly address your concerns.
  • Sign a waiver. All studios should have an insurance policy in place and should have you sign a waiver with any necessary medical info, including the name of an emergency contact. While serious injuries or lack of consciousness should be very rare, a good studio will be prepared for the worst case scenario!

Aerial arts can be fun, exciting, and a healthy challenge for your body and mind. 

We at Stomping Ground Studio want to make sure you walk into classes feeling confident and prepared. 

If you have more questions about classes, instructors, or our safety measures, don’t hesitate to reach out and ask! 

P.S. – Later this month, we’ll be giving you more information on exactly how to prepare for your first class – from what to eat (or not) to how to dress. Be sure to check back in so we can set you up for success!